
Adding beads to my cosplays is something I really like to do. It brings me back to when I was a synchronized swimmer and in charge of decorating the show swimsuits. Making sure these swimsuits were decorated in a way that they wouldn’t lose all their shine and glitter was very important for rewear purposes. And since they are skintight, working cleanly and adding some overlap with sequins to prevent stretch-gaps were also important. But let’s start with the basics!

Picture by MikoBura Photography
What do you need:
- Your fabric or piece of clothing.
- A pattern you want to bead.
- Optional: Fabric chalk, a pen or anything to make the pattern on your fabric as a guide. Carbon paper is also really neat!
- A small needle, that passes through your beads.
- Thread in a matching colour (or contrasting, if you’re feeling bold. It will show!).
- Beads. Any kind you need. I often work with seed beads, but sometimes I’ll use hangers too.
Step one
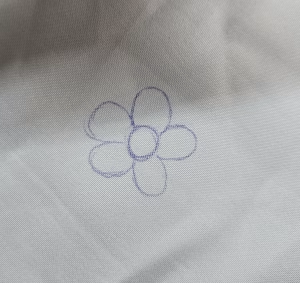
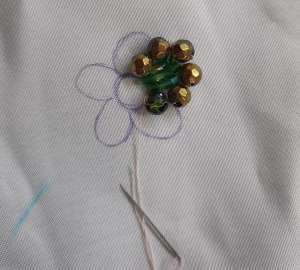
Have your pattern clear. A proper image, print, or drawn on the fabric will be a good guideline for your beadwork. I will just do a simple flower. Also check if the needle fits through the bead. You will need a small needle for this!
 .
.
Step two
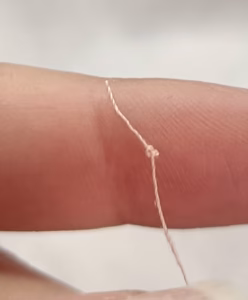
Thread your needle and make a good knot at the end. I prefer to make a double knot and stitch it through the fabric twice before adding beads.
Step three
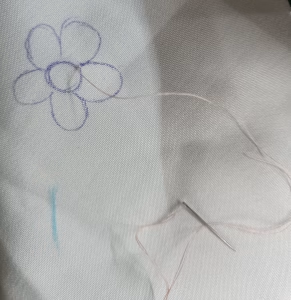
Load one bead on the thread and stitch it in place. Bring your needle back up as close as possible to the previous stitch.
Step four
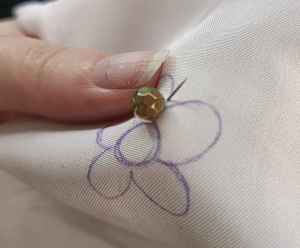
Once again, load one bead on the thread and stitch it in place following the guidelines. Doing one bead per stitch keeps them tight and sturdy. Doing more beads per stitch will increase the chances of sagging.
Step five
Once you are reaching the end of the thread, stop adding beads with this one. I prefer to stop adding beads with about 5 cms of thread left, so I can properly backstitch and hide the stitches. Hiding the stitches can be done under the previous beads. Now, go back to step one and repeat.
Step six
Keep going till your pattern is fully beaded. Don’t rush it! Take frequent breaks, check your posture regularly, and give your hands enough rest. Princess Zelda took me (excluding the cape) 450 hours of work. I did this next to being a high school student, so it took me 9 months to get it all done. Jup, that was kinda too much.

Princess Zelda, alternate outfit – Super Smash Bros. Brawl.
That’s it! The basics aren’t too difficult. Making it look good is. I have added a video of the beading I did, to show what it should look like when moving.
Other advice
Bead sizes:
- Bigger beads fill the area faster and will take less time to fill your pattern with.
- Smaller beads will give your project a lot more sparkle. Decide accordingly!
Stretch fabric:
- Do stretch the fabric a little when beading. Else your pattern will be stretched out thin when worn!
- Give the thread some space. Don’t pull it too hard, cause it will break when worn. If you pull the fabric a little, have the thread be straight, but not tight.
Hanging strings of beads:
- The Velkhana crown had hanging strings of beads. These will always be very fragile, but it can be done! I hid a strip of fabric behind the foam base and sewed the beads on that. The beads were one long string of round beads, then a hanger type bead and then back up through all the round beads into the fabric. Proper start and finish do make the difference here. Tie good and big knots and if it makes you feel more secure about the beads, add a dot of hot glue on the stitching and fabric.

Picture by Iloon Creations

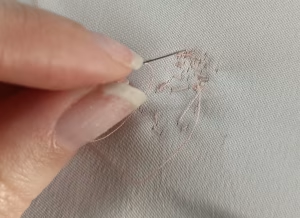
Transparent fabric:
- Bead work on transparent fabric means you have to work really neat. The thread will show, so take it even slower and breathe. But it can make for amazing looks like an ice cape! (No, not Elsa. Velkhana again :D)
- Don’t draw this pattern on with permanent inks. Use tailor’s chalk and trace it from paper that you lay under the fabric. It’s the easiest fabric to copy your guidelines to!
Sequins:
- The same steps apply as with regular bead work, but here it is sequin -> seed bead -> back through sequin -> needle through fabric.
- Sew the sequins with the concave side upwards for more sparkle! This is how it was done with the show swimsuits. <3